"Oh, Let's Be Adventurous Darling!"
I'm so crafty (well sort of) and by crafty I mean I can look at a picture and follow directions pretty well. My husband is the one with the good ideas actually. So since the twins started walking and becoming legit toddlers, hubs and I decided they needed a legit play space. We came up with the area in the front of our house that literally just has a piano in it. We thought lets make this a fun space.
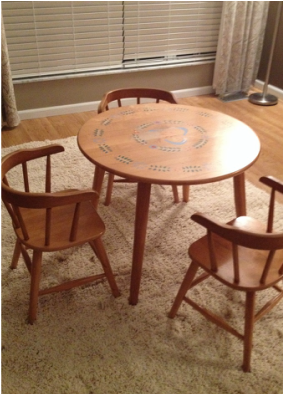
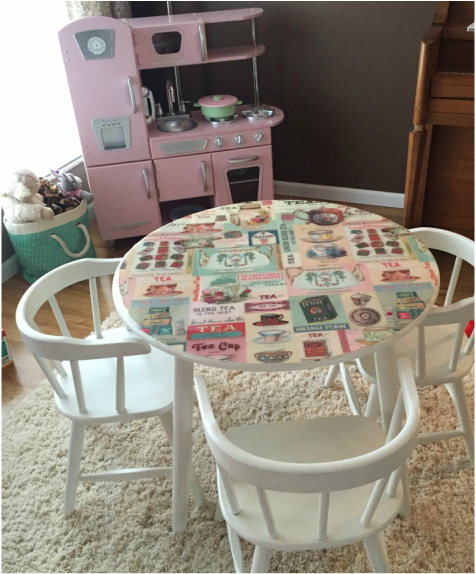
Any-who we inherited a darling play table from my husband's grandma's house. We wanted to give it a little updating. I had found an image on Pinterest of table that had used Modge Podge and some fabric to turn it into an adorable piece of furniture! So it began my inspiration for the toddler table face lift. I went on a hunt for some adorable paper. The first image is the the table before we did anything to it. I then sanded it down and painted it a semi gloss white. I did not paint the top of the table since it would be covered with the paper. I found some at Paper Source. It is actually a wrapping paper. It is an adorable tea party theme. Next
Any-who we inherited a darling play table from my husband's grandma's house. We wanted to give it a little updating. I had found an image on Pinterest of table that had used Modge Podge and some fabric to turn it into an adorable piece of furniture! So it began my inspiration for the toddler table face lift. I went on a hunt for some adorable paper. The first image is the the table before we did anything to it. I then sanded it down and painted it a semi gloss white. I did not paint the top of the table since it would be covered with the paper. I found some at Paper Source. It is actually a wrapping paper. It is an adorable tea party theme. Next
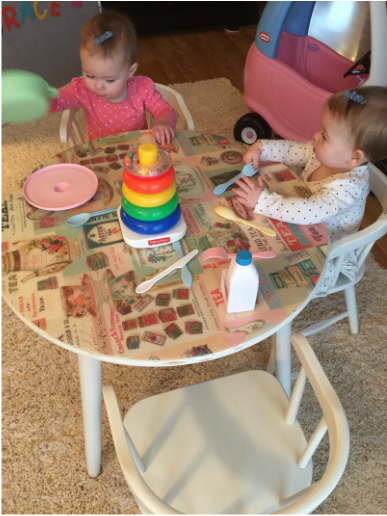
 Next we poured the Modge Podge into a plastic up and using a paint brush we applied a layer of Modge Podge to the table and a thin layer on the back of the paper and placed on the table. I then smoothed out all the bubble with my hands and used a credit card for the difficult bubbles. 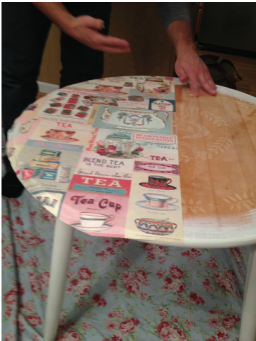 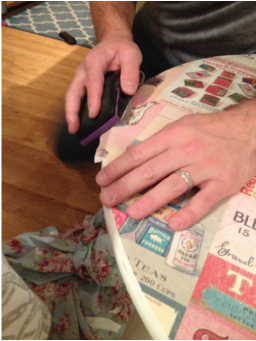 After finishing the project and letting the twins play with if or a while, I realized I really wanted a surface that could take a lot from 2 toddlers. So we came up with the idea of using a product called Glaze Coat. I bought it in the paint department of Lowes. It is a very hard glaze the kind you will find on bar in a restaurant. They sell it for home use as a kit. So we decided to use this product on top of the Modge Podge. We first tapped the surface with painters tape. I actually went around about 3 layers of painters tape to really make sure we had a good seal and no gaps. You will want to put down card board or something that you can throw away after and put it under the table. MAKE SURE YOUR TABLE IS LEVEL! The product levels itself since it is so thick. 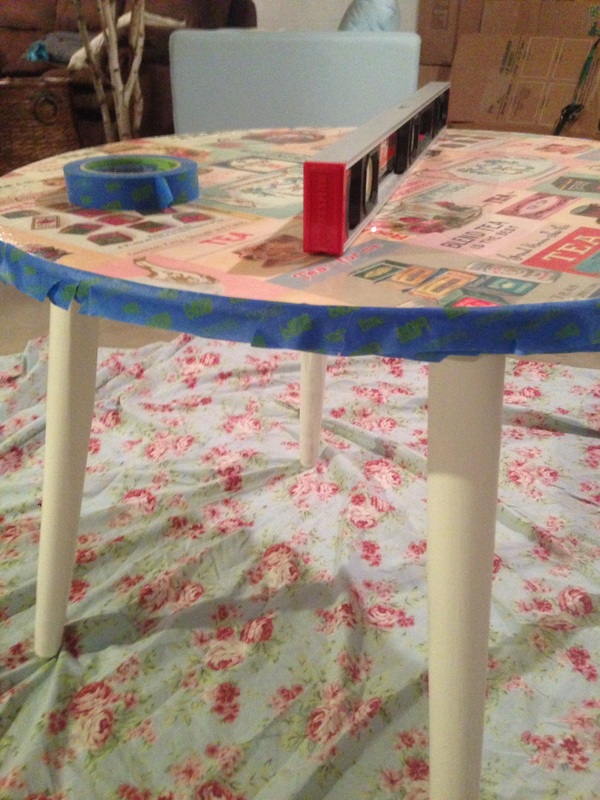 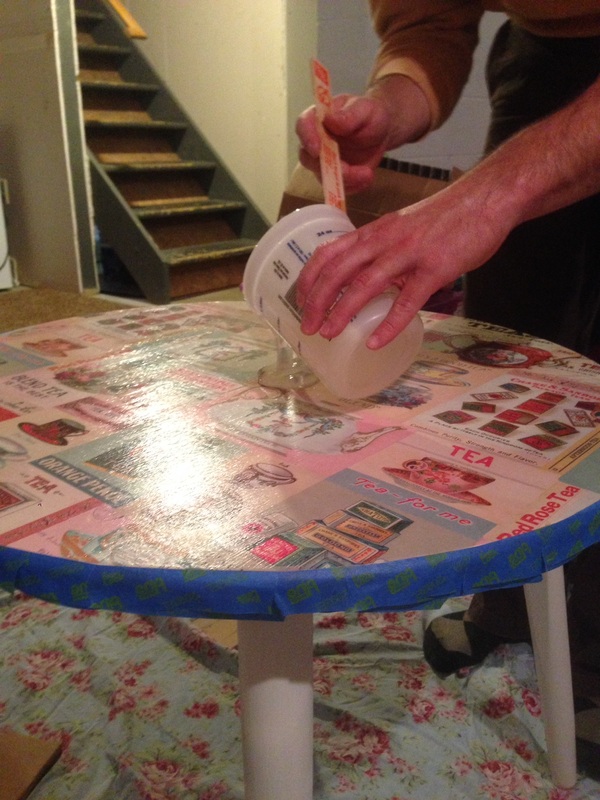 Once you have the glazed applied you will look for bubbles. You get rid of the bubbles by blowing on them. I know it sounds weird, but just lightly blow on the bubble and it will come to the surface and disappear. We only did one coat of the glaze and it looks amazing. We let it fully dry for 48 hours. Take a look at the drying process. 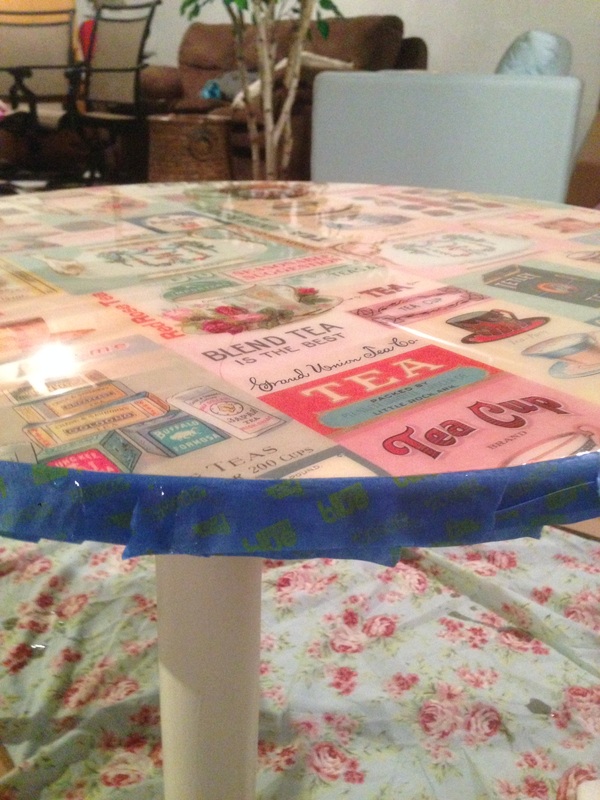 | 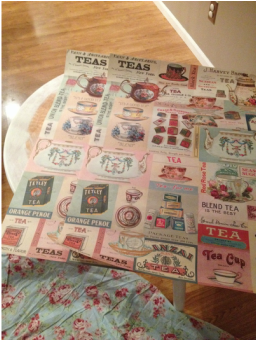 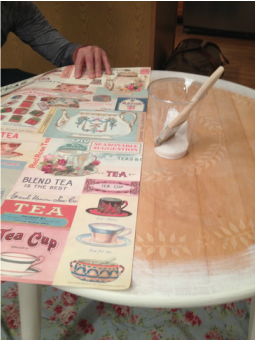 Once we got the first half of paper down we lined up the other half to match with the images of the paper already applied. We then trimmed the edges of the paper so that there was about a 1 inch lip of paper hanging over the edge. Next I applied 2 layers of Modge Podge over the paper. I let it dry for about 15 minutes between applications. After the last application I let it dry for 30 mins. After it had fully dried, my husband took a fine grit sanding block to the edges and sanded off the 1 inch lip of paper. I will leave a perfect edge. As you can see it will come off easily. Once we sanded all the way around the table I applied another 2 coats of Modge Podge. Here is what the table looked like! 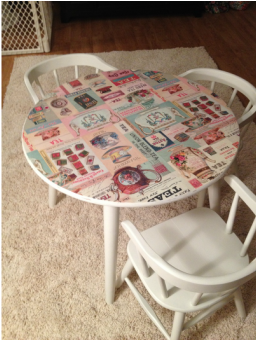 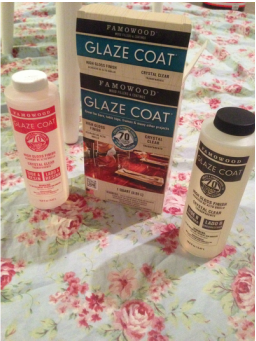 Once your table is level, follow the directions that come with the kit. The amount of glaze you will mix will depend on your surface area of the table. The formula is on the bottles. You will stir together the two bottle in the image above for about 5 minutes then apply the glaze to the table. Make sure you are in a fairly dust free area. We did it in our basement. Once you pour the glaze it will flow over the top and self level. You will need to use a paint brush to spread it to the edges. Don't worry about leveling it. It will level itself it is some really thick stuff. It might pour over the edges as well. It is okay because it will be caught on the painters tape. The image to the left shows us pouring the glaze on the table. You will want to use containers you can toss after the project. Once we poured the glaze we spread it with a brush. There will be no paint streaks in the glaze so (don't worry just get it spread out). 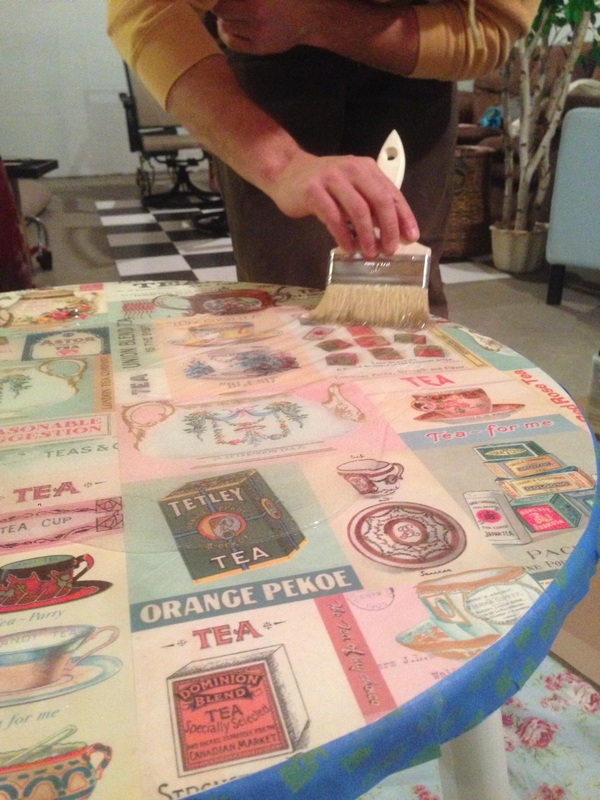 As you can see there is a high sheen on the table and it is super durable. We hope it will last for several years! Here is the finished product! 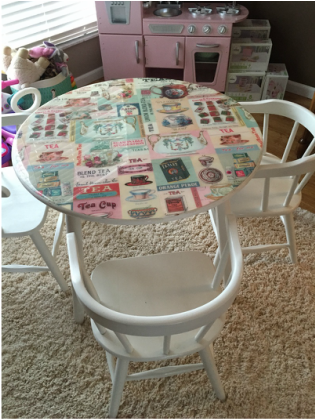 |
I think it is safe to say they adore the table. Love that it can now take the abuse of 2 toddlers banging on the surface. We hope to have it fore many years to come!


 RSS Feed
